Showing posts with label Projects. Show all posts

Monday, 16 January 2017

Project 2 - Solar: 2016 Update

The batteries and solar worked great throughout the summer of 2015, we never plugged in to shore power just like on old Trekker, all was good.  Then we went out for a cruise in mid September and had the pleasure of usually crowded anchorages all to ourselves!  After two nights and one partly cloudy day  at anchor we woke up to house batteries reading 10.9 volts, which is effectively dead. This didn't make any sense to me as the only serious electrical draw we have on the boat is the refrigerator, which draws an average of 2 amps per hour.  Lights are all LED (and we use them as though they are incandescent), we turn off instruments, didn't watch the TV ... you get the picture. In fact, we baby the batteries, only using our electric winches when the engine is running and generally being anal about taking care of them. So, if the batteries were 320 Ah, and we had been sitting for 40 hours using, to be conservative, 4 amps per hour we should only have used 160 Ah. And that was assuming no solar charging, and we knew there had been some.  So, on went the engine, we charged up and because I was now nervous about being caught out with no electricity, motored home.  We spent the balance of our vacation at the dock and prepared for, and hauled out a day early.  I completely disconnected the batteries for the winter. Pat Sturgeon came up and checked them with a cranking battery tester and declared them to be fine, and season done, I spent the winter trying to figure out why they appeared to be dead that morning!

In the spring I had Brian and Mike Kelly of Bayland Enterprises check the batteries with their deep cycle battery tester, and sure enough, one had only 105 Ah and the other 93 Ah.  

I spoke to Pat and we decided I would take the batteries back to Ontario Battery, that is a Victron dealer and they would check them too.  They got nearly the same results, so new batteries were in order.  Pat very kindly agreed to split them with me and we decided to get two more as well since we had decided we need more freezer space which would effectively double our draw.

We ordered and installed 4 new 165 Ah Victron AGM batteries and wired them up with the help of Mike Kelly at Bayland. While he was at it, I had Mike give the electrical system a "once over" and he was satisfied with the system architecture. He couldn't identify anything in particular that would have caused the early demise of our original batteries.  Pat Sturgeon helped with sleuthing a potential cause, and about all we were able to come up with was that the batteries were manufactured in the fall of 2013, sat in stock at Hanse for 6 months until they were installed in our boat early 2014, shipped to Canada,  and used to demo the boat for the summer.  We're not sure how well they were maintained at Hanse before they were installed, and I expect they were used hard on the boat to demonstrate the electric winches, the windlass etc. during the summer prior to our taking ownership.

I was still concerned that we hadn't found a clear cause for the original batteries being pooched.  After much internet research, apart from deciding that batteries and electrical systems are more of a black art than science, I learned that AGM batteries do not take well to being overcharged.  I decided that there was a chance that the batteries were being overcharged by our 115 amp alternator, since it seems to charge at 14.1V whether or not they were fully charged (which they usually are, being connected to solar). Victron states that the float voltage for the batteries is 13.5 to 13.8V.  At the same time I realized that we do not have a smart regulator like we did on old Trekker.

Mike at Bayland recommended a Sterling Alternator to Battery charger, which in addition to maintaining the float voltage at the recommended level also includes a "boost" function which is supposed to increase the amps going into the batteries and recharge them faster than the alternator can on its own. It also includes an alternator temperature sensor, which I thought would be a good idea, since our battery bank is really too large for the size of the alternator. 

The alternator to battery charger seemed to work well until  we went on holiday and started to discharge the battery bank to about 70% at which point, after 20 minutes it would trip due to excessive alternator temperature, supposedly greater than 90 degrees celsius. As a result we were losing the "boost" function, although it still maintained the absorption and float voltages at the correct values.  I bought an infra-red thermal gun and checked the alternator and found that it was getting nowhere near to 90C (65 was more like it), so now we had another puzzle to figure out.  It turned out that the alternator is mounted on a bracket which comes off the exhaust manifold, which is where Mike had installed the temperature sensor, so he moved it to another mounting point, and we'll see how it goes this summer.

Saturday, 31 December 2016

Project 6 - Full Cockpit Enclosure


Trekker was fitted with a dodger, bimini and "deflectors" as Pat Sturgeon referred to them when we bought her.  


Dodger, bimini & deflectors


For cruising Georgian Bay it's necessary to have a full enclosure with screens if one wants to sit in the cockpit at night and not get eaten alive by mosquitos. Our full cockpit enclosure keeps the rain and bugs out just like it is supposed to. Thank goodness because this was the most annoying of the projects to complete. 


Completed full enclosure
I've been told that if you can't say something nice about someone, then don't say anything at all.  So I won't, except to say I wish I had sought a few quotes for the canvas and that I had read the Google reviews before ordering the canvas from Island Canvas.

Friday, 30 December 2016

Project 5 - Cockpit Arch and Dinghy Lift


Hanse 415


I was attracted to the Hanse 415 in part because every sailing magazine review I read raved about how well it sailed and how easy it was to sail.  In addition, it looks fast!  I didn't want our solar panels and dinghy davits to make it look like a "caravan" as my Mom would have said. 


Typical davits 


Davits would be the obvious choice because they are a good place to mount solar panels. 


Hanse 415 swim platform


On Trekker though, the transom folds down into a swim platform so if we want to lift or deploy the dinghy with the transom down the davits would have to extend seven feet from the transom which in my opinion would be a challenge to support and not particularly attractive.  


I had noticed boats with stainless steel arches over the cockpit supporting solar panels, antennas, radar domes which looked quite attractive, so that solved the problem of where to mount the solar panel. Davits cantilevered off the arch though would be problematic because, again they would need to be too long. 


Sunsail 444
We chartered a Sunsail 444 in the British Virgin Islands a couple of years ago and it had a dinghy lift which consisted of a u-shaped tube from which the dinghy hung hinged at the deck between the hulls and had an electric winch to pull the hoop and dinghy up out of the water. It occurred to me that I could use the same design on Trekker since as the hoop is lowered, it would move the dinghy away from the transom to clear the swim platform.  We got quotes for the arch and dinghy lift from Klacko Marine and Stainless Steel Outfitters.  We decided to go with Klacko because my feeling was that their quote was more complete.  When it got warm enough to work on the boat we met Doug Gierula at the boat and discussed our thoughts on the arch and dinghy lift.  Doug was very familiar with what we were looking for, having designed similar arches and lifts for the Saga 43.  He took measurements, went away and worked up the design that he sent for our approval.  After a couple of tweaks of the length of the hoop we settled on the design and Doug began fabrication. We met again when he came to trial fit it, and discussed how best to handle life lines, stern rails, and the outboard motor mount and decided to incorporate them into the arch.  I had initially expected that the arch and dinghy lift would be on our critical path to shipping the boat, but in fact Doug had it fabricated just when promised and other projects were delayed.  The only issue that arose that I wasn't expecting was that the arch couldn't be installed prior to shipping the boat north as it would be too high to fit under the bridges on the highway!  So, Doug and Nadil fit it and removed it in Port Credit and we were tasked with installing it in Midland.  


Fast forward a few weeks and after the boat was launched the commissioning team that Pat Sturgeon had sent up to put the boat together helped lift the arch aboard, we liberally applied sealant around the base plates and installed bolts to hold it down.  The problem was that the we could only get nuts and washers on one or two of the four bolts on each foot. Part of the problem was that the two forward feet were ahead of the bulkhead at the aft end of the stern cabins, dark and very difficult to reach. 
Trekker's arch and dinghy lift
In addition, the outboard bolts were too close to the hull to fit a washer over them.  I spoke to Doug and enlisted the help of Nadil to figure out how to get the feet fastened down and we ended up using some aluminum bar, drilled and tapped to accept the outboard bolts and Nadil was able to contort himself to get nuts and washers on all the inside bolts. 
I'm hopeful the arch isn't going anywhere now!

We have two six to one block and tackle to lower and lift the hoop and four to one at the bow and stern to adjust the height of the dinghy. Under way we use four straps to secure it fore and aft and diagonally to the arch and so far it sits quietly there until its time to go for a ride!

Projects 3 & 4 - Holding Tank & Washdown Pump


Holding Tank

The Hanse 415 was not designed as a Great Lakes boat.  She has a 35 litre (7.7 imperial gallons for those not yet converted) holding tank.  That's okay for a weekend jaunt but certainly not for living aboard for two weeks during our summer vacation or coastal cruising south.


The holding tank was the biggest project that Nadil from NM Marine Services did for us. 


Image result for marine y-valveImage result for marine y-valve

Our system is similar to the picture at right.  The discharge from the head goes to a Y-valve, and after the Y-valve one branch goes to the new holding tank and the other goes to our original 35 litre tank.

We decided to install the holding tank under the port aft berth, since there was space there in close proximity to the head.


First Nadil made up a wooden template of the tank, so that he would be sure that it fit, and to provide the manufacturer with exact dimensions. Once manufactured, he braced the tank fore and aft and laterally and strapped it down to blocks bonded to the hull.


I asked Nadil to install two vents because I have read that it is the anaerobic bugs that smell not the aerobic bugs and we wanted to encourage the aerobic ones!

The best quality sanitation hose money can buy completed the system.

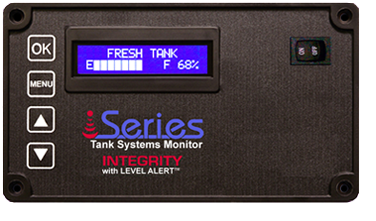
iSeriesWhile we were at it we decided to install a tank monitor so that we wouldn't have to guess how full the holding tanks are. We selected a multi-tank system so that we could also monitor the original holding tank.  Of course installing a tank monitor means that it needs to be calibrated.  Because the new holding tank was an irregular shape we first needed to determine its exact volume.  We did this by measuring the volume of a bucket and then using the bucket to fill the tank.  You'd be surprised at how long it takes to fill a 178 litre tank (40 imp. gal.) with a 10 litre pail through a small funnel!  Then we had to pump out and then refill it in increments of 10% and program the tank monitor at each increment. Then we had to pump out again!  Suffice to say the dock staff at Hindson Marina where we keep the boat were very patient as we went through the process.
Hot Shot 6 Washdown Pump Kit, 6GPM Pump

Washdown Pump

We found a 5.2 gpm JABSCO washdown pump on sale at Fogh Boat Supplies and picked it up for Nadil to install.  We decided to install it amidships so that we could reach both ends of the boat with one length of hose.  That actually worked out well because it was adjacent to the head and the access to the original holding tank and its deck fitting. Nadil did a great job of fitting the pump under the shower seat, t-ing the intake into the head intake and running hoses discretely. 

Both the holding tank and pump work just as planned.

Project 2 - Solar

There are three scarce resources aboard a cruising boat: water, black water holding capacity and electricity.  

Electricity is typically supplied by 12 volt batteries.  Trekker was delivered with a house bank of two Victron Energy AGM batteries of 160 Amp hours each and a starting battery of 90 Ah.  Refrigeration, radios, lights, instruments, and mobile devices all run off electricity, so it's critical that the batteries always be charged. 

On our Catalina 36 MkII the previous owner had installed 300 watts of solar panels which served our needs perfectly.  We very rarely plugged in to 110V shore power to charge batteries. We decided it was a must to have solar on Trekker as well.

The selection of manufacturers offering solar hardware is daunting.  To narrow down the field, I thought it would be a good idea to try and stay with the same brand as the batteries, assuming that all the pieces would play well together!

I also needed to fit the panels into the space we have beside, between and behind the backstays.  

Based on this criteria, I decided to go with one big HES 250 Watt solar panel that fit between the split backstays on top of our cockpit arch. More on the arch in another post.  

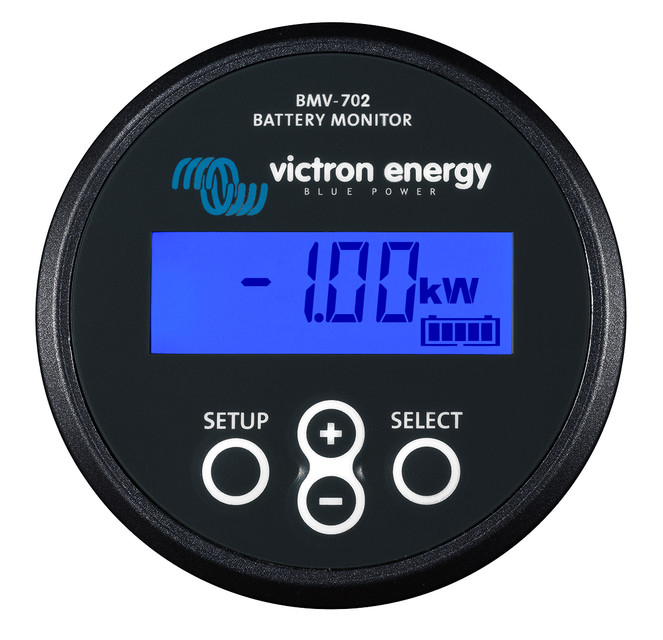
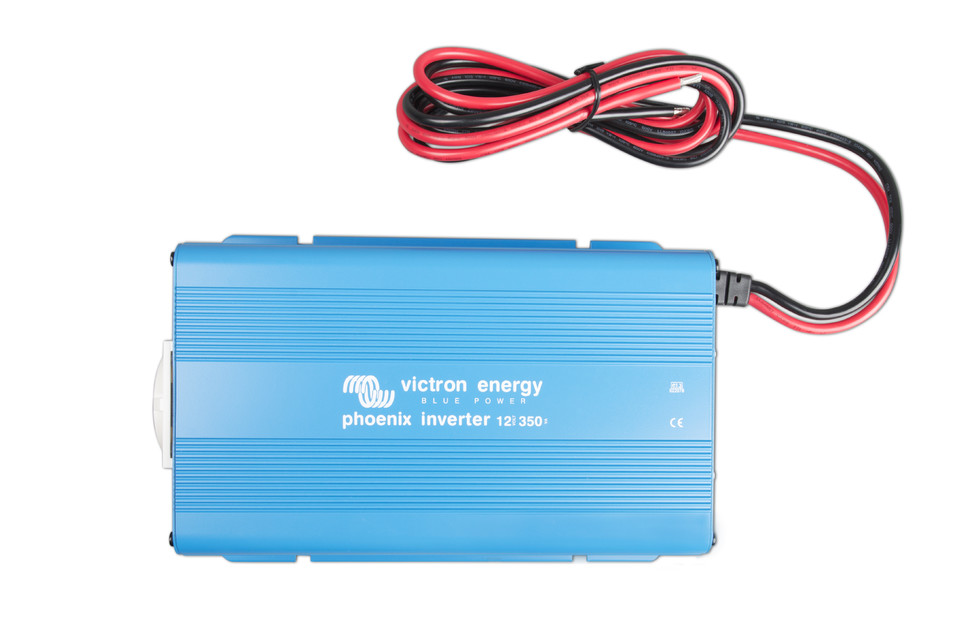
A Victron brand Blue Solar MPPT 150/35 solar controller, Phoenix 350W inverter and BMV-702S battery monitor completed the kit. 


BlueSolar MPPT 150/35 up to 150/100


Over the years I've come to realize that it is worth paying to have someone that knows what they are doing do certain things.  Drywalling comes to mind. It's not that I can't do it ... it's just that it takes me forever, and I create a lot more dust than a good tradesman!  Similarly, I probably could have installed the solar kit myself, but I have a full time job, and we wanted to sail this summer ... 

Pat Sturgeon recommended Nadil Mohammad of N.M. Marine Services as someone that knows what they are doing around boats.  In early March Karen and I met Nadil on Trekker and discussed the projects.  Nadil gave us a quote which seemed very reasonable for our projects, so we asked him to go ahead.

Beginning around the end of March, Nadil began working on the projects including the solar controller, inverter and monitor.  The size of the inverter was the subject of some discussion among Stefan at Ontario Battery Services, where we bought the solar kit, Nadil, Pat and my brother, who had just returned from cruising the Bahamas.  Some said the bigger the better, others said that a bigger inverter will likely hum when it is on and if we were not intending to have a microwave (which we are not) would not be necessary.  At the end of the day we decided on the smaller inverter which is enough to run the TV and computer, we can always change to a bigger one if necessary. 


250 W solar panel mounted on cockpit arch
As mentioned, we mounted the panel on the arch. We used u-bolts around the tubes of the arch bolted into the frame. The wires run through the tubes and down below to a terminal block (to allow for removal of the arch) and then forward to the solar controller located adjacent to the batteries. The inverter and battery monitor are also located in the same vicinity. The installation went as planned and once connected everything worked just as we had expected! 

Project 1 - The Name

I've mentioned to a few people that I think naming a boat is more difficult than picking a name for a child.

I think that a boat name reflects the personality and dreams of its owners and the character of the boat.    

In addition to the name, one has to choose a font style, the size of the font, the colour and where on the boat to position the name.

After much debate we decided to stick with Trekker, a name that my parents used on their boats and that we named our Catalina 36 MkII.

Pat Sturgeon recommended Bill from the Original Sign Shoppe for the name.  Bill was very patient with us as we had him size out various fonts in lower case and upper case as we tried to fit the same font into the space we had available on the transom and at the bow.


As soon as Bill emailed me that the name was on the boat I drove down to have a look.  As I was taking a picture of the bow, my heart sank as I realized that the bottom of the name was aligned with the cove stripe rather than the middle as I had asked. 


I called him right away and he immediately agreed to remove and reapply the names in the position I had hoped.

He did a great job, and we love our new Trekker name!

Projects for living aboard


We bought our Hanse 415 Trekker new in 2014. While she was reasonably well fitted out, she still needed some work to make her comfortable for living aboard.

My parents named their Alberg 37, and several more of their boats after that, Trekker. My Mom passed away just before we bought our last boat, a Catalina 36 MkII, so as a tribute to her we decided we would name our Catalina "Trekker". After much debate we decided to de-register our Catalina and name our Hanse 415 "Trekker" too.  Our first project therefore was to pick locations for the name on the hull, a font, a colour and sizes for the name, and find someone to install them.

We inherited solar power on our Catalina and believe it to be indispensable on a boat that you want to live on, unplugged. Installing solar was project 2.

The Hanse 415 only has a 35 litre holding tank. I guess that isn't a problem if you sail in the ocean where the holding tank can be emptied 3 miles offshore. But if you sail in Georgian Bay, like us, or coastal USA, both of which are no discharge zones, it is too small!  Project number 3 was to have an additional holding tank fabricated and installed. 

Our old boat had a washdown pump which we found very useful; project 4.


We felt we needed davits or some other form of lifting system for the dinghy and motor.  Trekker has a 10 foot wide swim platform that folds down from the transom that we needed to accommodate. That was project 5.

Finally, if you cruise Georgian Bay, you quickly learn that a full enclosure with mosquito screens allows the cockpit to be used between dusk and dawn! A full enclosure became project 6.

No doubt after we have sailed her for a summer, we'll discover that some more upgrades would be nice.

Oddly enough, only two of our first five projects was completed as planned.  I'll elaborate in future posts.